PoE Balance Manifesto: Eldritch Altars
List of PoE Altar Mods - Eldritch Altars
| # | Category | Side | Choice Type | Name |
|---|---|---|---|---|
| 1 |  | Downside | Map boss gains: | +10% to maximum Cold Resistance +80% to Cold Resistance +10% to maximum Lightning Resistance +80% to Lightning Resistance |
| 2 | | Downside | Map boss gains: | (50–70)% additional Physical Damage Reduction |
| 3 | | Downside | Map boss gains: | All Damage with Hits can Chill |
| 4 | | Downside | Map boss gains: | Hits always Shock All Damage can Shock |
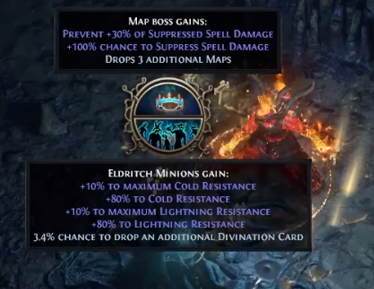
| 5 | | Downside | Map boss gains: | Prevent +(20–30)% of Suppressed Spell Damage +100% chance to Suppress Spell Damage |
| 6 | | Downside | Map boss gains: | Gain (50–80)% of Physical Damage as Extra Damage of a random Element Damage Penetrates (15–25)% of Enemy Elemental Resistances |
| 7 | | Downside | Map boss gains: | Gain (50–80)% of Physical Damage as Extra Cold Damage Cover Enemies in Frost on Hit |
| 8 | | Downside | Map boss gains: | 100% Global chance to Blind Enemies on hit (100–200)% increased Blind Effect |
| 9 | | Downside | Map boss gains: | Gain (50–70)% of Maximum Life as Extra Maximum Energy Shield |
| 10 | | Downside | Map boss gains: | Gain (70–130)% of Physical Damage as Extra Cold Damage All Damage with Hits can Chill |
| 11 | | Downside | Map boss gains: | Hits always Shock Gain (70–130)% of Physical Damage as Extra Lightning Damage All Damage can Shock |
| 12 | | Downside | Map boss gains: | Eldritch Tentacles |
| 13 | | Downside | Eldritch Minions gain: | Overwhelm (50–80)% Physical Damage Reduction |
| 14 | | Downside | Eldritch Minions gain: | Skills fire (3–5) additional Projectiles |
| 15 | | Downside | Eldritch Minions gain: | (30–50)% increased Attack Speed (30–50)% increased Cast Speed (30–50)% increased Movement Speed |
| 16 | | Downside | Eldritch Minions gain: | +10% to maximum Cold Resistance +80% to Cold Resistance +10% to maximum Lightning Resistance +80% to Lightning Resistance |
| 17 | | Downside | Eldritch Minions gain: | (50–80)% additional Physical Damage Reduction |
| 18 | | Downside | Eldritch Minions gain: | Prevent +(20–30)% of Suppressed Spell Damage +100% chance to Suppress Spell Damage |
| 19 | | Downside | Eldritch Minions gain: | 100% chance to remove a random Charge from Enemy on Hit |
| 20 | | Downside | Eldritch Minions gain: | Drops Chilled Ground on Death, lasting 3 seconds |
| 21 | | Downside | Eldritch Minions gain: | 100% chance to create Shocked Ground on Death, lasting 3 seconds |
| 22 | | Downside | Eldritch Minions gain: | Inflict 1 Grasping Vine on Hit |
| 23 | | Downside | Eldritch Minions gain: | Curse Enemies with Punishment on Hit |
| 24 | | Downside | Eldritch Minions gain: | Gain (70–130)% of Physical Damage as Extra Lightning Damage |
| 25 | | Downside | Eldritch Minions gain: | Gain (70–130)% of Physical Damage as Extra Cold Damage |
| 26 | | Downside | Player gains: | (-60–-40)% to Cold Resistance (-60–-40)% to Lightning Resistance |
| 27 | | Downside | Player gains: | (-60–-40)% additional Physical Damage Reduction |
| 28 | | Downside | Player gains: | (30–50)% reduced Defences per Frenzy Charge |
| 29 | | Downside | Player gains: | (10–20)% reduced Recovery Rate of Life, Mana and Energy Shield per Endurance Charge |
| 30 | | Downside | Player gains: | (10–20)% reduced Cooldown Recovery Rate per Power Charge |
| 31 | | Downside | Player gains: | (25–35)% chance for Enemies to drop Chilled Ground when Hitting you, no more than once every 2 seconds |
| 32 | | Downside | Player gains: | (25–35)% chance for Enemies to drop Shocked Ground when Hitting you, no more than once every 2 seconds |
| 33 | | Downside | Player gains: | All Damage taken from Hits can Sap you (25–35)% chance to be Sapped when Hit |
| 34 | | Downside | Player gains: | Nearby Enemies Gain 100% of their Physical Damage as Extra Cold Damage |
| 35 | | Downside | Player gains: | Nearby Enemies Gain 100% of their Physical Damage as Extra Lightning Damage |
| 36 | | Downside | Player gains: | Projectiles are fired in random directions |
| 37 | | Downside | Player gains: | Spell Hits have (25–35)% chance to Hinder you |
| 38 | | Downside | Player gains: | Non-Damaging Ailments you inflict are reflected back to you |
| 39 | | Downside | Player gains: | number of grasping vines to gain every second while stationary [1] |
| 40 |  | Downside | Map boss gains: | Create Consecrated Ground on Hit, lasting 6 seconds |
| 41 | | Downside | Map boss gains: | +10% to maximum Fire Resistance +80% to Fire Resistance +10% to maximum Chaos Resistance +80% to Chaos Resistance |
| 42 | | Downside | Map boss gains: | +50000 to Armour |
| 43 | | Downside | Map boss gains: | Gain (50–80)% of Physical Damage as Extra Fire Damage Cover Enemies in Ash on Hit |
| 44 | | Downside | Map boss gains: | Hits always Ignite All Damage can Ignite |
| 45 | | Downside | Map boss gains: | Poison on Hit All Damage from Hits can Poison |
| 46 | | Downside | Map boss gains: | Enemies lose 6 Flask Charges every 3 seconds and cannot gain Flask Charges for 6 seconds after being Hit |
| 47 | | Downside | Map boss gains: | Gain (50–80)% of Physical Damage as Extra Damage of a random Element Damage Penetrates (15–25)% of Enemy Elemental Resistances |
| 48 | | Downside | Map boss gains: | Your hits inflict Malediction |
| 49 | | Downside | Map boss gains: | Hits always Ignite Gain (70–130)% of Physical Damage as Extra Fire Damage All Damage can Ignite |
| 50 | | Downside | Map boss gains: | Gain (70–130)% of Physical Damage as Extra Chaos Damage Poison on Hit All Damage from Hits can Poison |
| 51 | | Downside | Map boss gains: | (100–200)% increased Armour (100–200)% increased Evasion Rating |
| 52 | | Downside | Map boss gains: | Nearby Enemies are Hindered, with 40% reduced Movement Speed hinder aura behaviour variation [1] |
| 53 | | Downside | Eldritch Minions gain: | Drops Burning Ground on Death, lasting 3 seconds |
| 54 | | Downside | Eldritch Minions gain: | Create Consecrated Ground on Death, lasting 6 seconds |
| 55 | | Downside | Eldritch Minions gain: | Gain (70–130)% of Physical Damage as Extra Damage of a random Element Inflict Fire, Cold, and Lightning Exposure on Hit |
| 56 | | Downside | Eldritch Minions gain: | Enemies lose 6 Flask Charges every 3 seconds and cannot gain Flask Charges for 6 seconds after being Hit |
| 57 | | Downside | Eldritch Minions gain: | +10% to maximum Fire Resistance +80% to Fire Resistance +10% to maximum Chaos Resistance +80% to Chaos Resistance |
| 58 | | Downside | Eldritch Minions gain: | +50000 to Armour |
| 59 | | Downside | Eldritch Minions gain: | (70–130)% increased Area of Effect |
| 60 | | Downside | Eldritch Minions gain: | (250–500)% increased Evasion Rating |
| 61 | | Downside | Eldritch Minions gain: | Hits always Ignite All Damage can Ignite |
| 62 | | Downside | Eldritch Minions gain: | Poison on Hit All Damage from Hits can Poison |
| 63 | | Downside | Eldritch Minions gain: | Curse Enemies with Vulnerability on Hit |
| 64 | | Downside | Eldritch Minions gain: | Gain (70–130)% of Physical Damage as Extra Chaos Damage |
| 65 | | Downside | Eldritch Minions gain: | Gain (70–130)% of Physical Damage as Extra Fire Damage |
| 66 | | Downside | Player gains: | (-60–-40)% to Fire Resistance (-60–-40)% to Chaos Resistance |
| 67 | | Downside | Player gains: | -3000 to Armour -3000 to Evasion Rating |
| 68 | | Downside | Player gains: | (20–40)% increased Flask Charges used (40–60)% reduced Flask Effect Duration |
| 69 | | Downside | Player gains: | Take 600 Chaos Damage per second during any Flask Effect |
| 70 | | Downside | Player gains: | Spell Hits have (20–30)% chance to Hinder you |
| 71 | | Downside | Player gains: | All Damage taken from Hits can Scorch you (25–35)% chance to be Scorched when Hit |
| 72 | | Downside | Player gains: | Curses you inflict are reflected back to you |
| 73 | | Downside | Player gains: | (15–20)% chance for Enemies to drop Burning Ground when Hitting you, no more than once every 2 seconds |
| 74 | | Downside | Player gains: | 30% chance to be targeted by a Meteor when you use a Flask |
| 75 | | Downside | Player gains: | Nearby Enemies Gain 100% of their Physical Damage as Extra Fire Damage |
| 76 | | Downside | Player gains: | Nearby Enemies Gain 100% of their Physical Damage as Extra Chaos Damage |
| 77 | | Upside | Map boss gains: | Final Boss drops (2–4) additional Divine Orbs |
| 78 | | Upside | Map boss gains: | Final Boss drops (2–4) additional Exalted Orbs |
| 79 | | Upside | Map boss gains: | Final Boss drops (2–4) additional Regal Orbs |
| 80 | | Upside | Map boss gains: | Final Boss drops (2–4) additional Lesser Eldritch Ichors |
| 81 | | Upside | Map boss gains: | Final Boss drops (2–4) additional Greater Eldritch Ichors |
| 82 | | Upside | Map boss gains: | Final Boss drops (2–4) additional Grand Eldritch Ichors |
| 83 | | Upside | Map boss gains: | Final Boss drops (2–4) additional Eldritch Chaos Orbs |
| 84 | | Upside | Map boss gains: | Final Boss drops (2–4) additional Eldritch Exalted Orbs |
| 85 | | Upside | Map boss gains: | Final Boss drops (2–4) additional Eldritch Orbs of Annulment |
| 86 | | Upside | Map boss gains: | Final Boss drops (2–4) additional Chaos Orbs |
| 87 | | Upside | Map boss gains: | Final Boss drops (2–4) additional Veiled Chaos Orbs |
| 88 | | Upside | Map boss gains: | Final Boss drops (2–4) additional Orbs of Alteration |
| 89 | | Upside | Map boss gains: | Final Boss drops (2–4) additional Blessed Orbs |
| 90 | | Upside | Map boss gains: | Final Boss drops (2–4) additional Orbs of Scouring |
| 91 | | Upside | Map boss gains: | Final Boss drops (2–4) additional Chromatic Orbs |
| 92 | | Upside | Map boss gains: | Final Boss drops (2–4) additional Orbs of Fusing |
| 93 | | Upside | Map boss gains: | Final Boss drops (2–4) additional Jeweller's Orbs |
| 94 | | Upside | Eldritch Minions gain: | (1.6–3.2)% chance to drop an additional Divine Orb |
| 95 | | Upside | Eldritch Minions gain: | (1.6–3.2)% chance to drop an additional Exalted Orb |
| 96 | | Upside | Eldritch Minions gain: | (1.6–3.2)% chance to drop an additional Regal Orb |
| 97 | | Upside | Eldritch Minions gain: | (1.6–3.2)% chance to drop an additional Lesser Eldritch Ichor |
| 98 | | Upside | Eldritch Minions gain: | (1.6–3.2)% chance to drop an additional Greater Eldritch Ichor |
| 99 | | Upside | Eldritch Minions gain: | (1.6–3.2)% chance to drop an additional Grand Eldritch Ichor |
| 100 | | Upside | Eldritch Minions gain: | (1.6–3.2)% chance to drop an additional Eldritch Chaos Orb |
| 101 | | Upside | Eldritch Minions gain: | (1.6–3.2)% chance to drop an additional Eldritch Exalted Orb |
| 102 | | Upside | Eldritch Minions gain: | (1.6–3.2)% chance to drop an additional Eldritch Orb of Annulment |
| 103 | | Upside | Eldritch Minions gain: | (1.6–3.2)% chance to drop an additional Chaos Orb |
| 104 | | Upside | Eldritch Minions gain: | (1.6–3.2)% chance to drop an additional Veiled Chaos Orb |
| 105 | | Upside | Eldritch Minions gain: | (1.6–3.2)% chance to drop an additional Orb of Alteration |
| 106 | | Upside | Eldritch Minions gain: | (1.6–3.2)% chance to drop an additional Blessed Orb |
| 107 | | Upside | Eldritch Minions gain: | (1.6–3.2)% chance to drop an additional Orb of Scouring |
| 108 | | Upside | Eldritch Minions gain: | (1.6–3.2)% chance to drop an additional Chromatic Orb |
| 109 | | Upside | Eldritch Minions gain: | (1.6–3.2)% chance to drop an additional Orb of Fusing |
| 110 | | Upside | Eldritch Minions gain: | (1.6–3.2)% chance to drop an additional Jeweller's Orb |
| 111 | | Upside | Eldritch Minions gain: | (1.6–3.2)% chance to drop an additional Rusted Breach Scarab |
| 112 | | Upside | Eldritch Minions gain: | (1.6–3.2)% chance to drop an additional Polished Breach Scarab |
| 113 | | Upside | Eldritch Minions gain: | (1.6–3.2)% chance to drop an additional Gilded Breach Scarab |
| 114 | | Upside | Eldritch Minions gain: | (1.6–3.2)% chance to drop an additional Rusted Elder Scarab |
| 115 | | Upside | Eldritch Minions gain: | (1.6–3.2)% chance to drop an additional Polished Elder Scarab |
| 116 | | Upside | Eldritch Minions gain: | (1.6–3.2)% chance to drop an additional Gilded Elder Scarab |
| 117 | | Upside | Eldritch Minions gain: | (1.6–3.2)% chance to drop an additional Rusted Sulphite Scarab |
| 118 | | Upside | Eldritch Minions gain: | (1.6–3.2)% chance to drop an additional Polished Sulphite Scarab |
| 119 | | Upside | Eldritch Minions gain: | (1.6–3.2)% chance to drop an additional Gilded Sulphite Scarab |
| 120 | | Upside | Eldritch Minions gain: | (1.6–3.2)% chance to drop an additional Rusted Ambush Scarab |
| 121 | | Upside | Eldritch Minions gain: | (1.6–3.2)% chance to drop an additional Polished Ambush Scarab |
| 122 | | Upside | Eldritch Minions gain: | (1.6–3.2)% chance to drop an additional Gilded Ambush Scarab |
| 123 | | Upside | Eldritch Minions gain: | (1.6–3.2)% chance to drop an additional Rusted Harbinger Scarab |
| 124 | | Upside | Eldritch Minions gain: | (1.6–3.2)% chance to drop an additional Polished Harbinger Scarab |
| 125 | | Upside | Eldritch Minions gain: | (1.6–3.2)% chance to drop an additional Gilded Harbinger Scarab |
| 126 | | Upside | Eldritch Minions gain: | (1.6–3.2)% chance to drop an additional Rusted Expedition Scarab |
| 127 | | Upside | Eldritch Minions gain: | (1.6–3.2)% chance to drop an additional Polished Expedition Scarab |
| 128 | | Upside | Eldritch Minions gain: | (1.6–3.2)% chance to drop an additional Gilded Expedition Scarab |
| 129 | | Upside | Eldritch Minions gain: | (1.6–3.2)% chance to drop an additional Rusted Legion Scarab |
| 130 | | Upside | Eldritch Minions gain: | (1.6–3.2)% chance to drop an additional Polished Legion Scarab |
| 131 | | Upside | Eldritch Minions gain: | (1.6–3.2)% chance to drop an additional Gilded Legion Scarab |
| 132 | | Upside | Eldritch Minions gain: | (1.6–3.2)% chance to drop an additional Rusted Abyss Scarab |
| 133 | | Upside | Eldritch Minions gain: | (1.6–3.2)% chance to drop an additional Polished Abyss Scarab |
| 134 | | Upside | Eldritch Minions gain: | (1.6–3.2)% chance to drop an additional Gilded Abyss Scarab |
| 135 | | Upside | Eldritch Minions gain: | (1.6–3.2)% chance to drop an additional Divination Card which rewards Currency |
| 136 | | Upside | Eldritch Minions gain: | (1.6–3.2)% chance to drop an additional Divination Card which rewards Basic Currency |
| 137 | | Upside | Eldritch Minions gain: | (1.6–3.2)% chance to drop an additional Divination Card which rewards League Currency |
| 138 | | Upside | Eldritch Minions gain: | (1.6–3.2)% chance to drop an additional Divination Card which rewards other Divination Cards |
| 139 | | Upside | Eldritch Minions gain: | (1.6–3.2)% chance to drop an additional Divination Card which rewards Gems |
| 140 | | Upside | Eldritch Minions gain: | (1.6–3.2)% chance to drop an additional Divination Card which rewards Levelled Gems |
| 141 | | Upside | Eldritch Minions gain: | (1.6–3.2)% chance to drop an additional Divination Card which rewards Quality Gems |
| 142 | | Upside | Map boss gains: | Final Boss drops (2–4) additional Rusted Breach Scarabs |
| 143 | | Upside | Map boss gains: | Final Boss drops (2–4) additional Polished Breach Scarabs |
| 144 | | Upside | Map boss gains: | Final Boss drops (2–4) additional Gilded Breach Scarabs |
| 145 | | Upside | Map boss gains: | Final Boss drops (2–4) additional Rusted Elder Scarabs |
| 146 | | Upside | Map boss gains: | Final Boss drops (2–4) additional Polished Elder Scarabs |
| 147 | | Upside | Map boss gains: | Final Boss drops (2–4) additional Gilded Elder Scarabs |
| 148 | | Upside | Map boss gains: | Final Boss drops (2–4) additional Rusted Sulphite Scarabs |
| 149 | | Upside | Map boss gains: | Final Boss drops (2–4) additional Polished Sulphite Scarabs |
| 150 | | Upside | Map boss gains: | Final Boss drops (2–4) additional Gilded Sulphite Scarabs |
| 151 | | Upside | Map boss gains: | Final Boss drops (2–4) additional Rusted Ambush Scarabs |
| 152 | | Upside | Map boss gains: | Final Boss drops (2–4) additional Polished Ambush Scarabs |
| 153 | | Upside | Map boss gains: | Final Boss drops (2–4) additional Gilded Ambush Scarabs |
| 154 | | Upside | Map boss gains: | Final Boss drops (2–4) additional Rusted Harbinger Scarabs |
| 155 | | Upside | Map boss gains: | Final Boss drops (2–4) additional Polished Harbinger Scarabs |
| 156 | | Upside | Map boss gains: | Final Boss drops (2–4) additional Gilded Harbinger Scarabs |
| 157 | | Upside | Map boss gains: | Final Boss drops (2–4) additional Rusted Expedition Scarabs |
| 158 | | Upside | Map boss gains: | Final Boss drops (2–4) additional Polished Expedition Scarabs |
| 159 | | Upside | Map boss gains: | Final Boss drops (2–4) additional Gilded Expedition Scarabs |
| 160 | | Upside | Map boss gains: | Final Boss drops (2–4) additional Rusted Legion Scarabs |
| 161 | | Upside | Map boss gains: | Final Boss drops (2–4) additional Polished Legion Scarabs |
| 162 | | Upside | Map boss gains: | Final Boss drops (2–4) additional Gilded Legion Scarabs |
| 163 | | Upside | Map boss gains: | Final Boss drops (2–4) additional Rusted Abyss Scarabs |
| 164 | | Upside | Map boss gains: | Final Boss drops (2–4) additional Polished Abyss Scarabs |
| 165 | | Upside | Map boss gains: | Final Boss drops (2–4) additional Gilded Abyss Scarabs |
| 166 | | Upside | Map boss gains: | Final Boss drops (2–4) additional Divination Cards which reward Currency |
| 167 | | Upside | Map boss gains: | Final Boss drops (2–4) additional Divination Cards which reward Basic Currency |
| 168 | | Upside | Map boss gains: | Final Boss drops (2–4) additional Divination Cards which reward League Currency |
| 169 | | Upside | Map boss gains: | Final Boss drops (2–4) additional Divination Cards which reward other Divination Cards |
| 170 | | Upside | Map boss gains: | Final Boss drops (2–4) additional Divination Cards which reward Gems |
| 171 | | Upside | Map boss gains: | Final Boss drops (2–4) additional Divination Cards which reward Levelled Gems |
| 172 | | Upside | Map boss gains: | Final Boss drops (2–4) additional Divination Cards which reward Quality Gems |
| 173 | | Upside | Player gains: | Basic Currency Items dropped by slain Enemies have (15–30)% chance to be Duplicated |
| 174 | | Upside | Player gains: | Gems dropped by slain Enemies have (15–30)% chance to be Duplicated |
| 175 | | Upside | Player gains: | Unique Items dropped by slain Enemies have (15–30)% chance to be Duplicated |
| 176 | | Upside | Player gains: | Scarabs dropped by slain Enemies have (15–30)% chance to be Duplicated |
| 177 | | Upside | Player gains: | Maps dropped by slain Enemies have (15–30)% chance to be Duplicated |
| 178 | | Upside | Player gains: | Divination Cards dropped by slain Enemies have (15–30)% chance to be Duplicated |
| 179 | | Upside | Player gains: | (10–20)% increased Quantity of Items found in this Area (15–35)% increased Rarity of Items found in this Area |
| 180 | | Upside | Map boss gains: | Final Boss drops (2–4) additional Divine Orbs |
| 181 | | Upside | Map boss gains: | Final Boss drops (2–4) additional Awakened Sextants |
| 182 | | Upside | Map boss gains: | Final Boss drops (2–4) additional Orbs of Binding |
| 183 | | Upside | Map boss gains: | Final Boss drops (2–4) additional Orbs of Horizons |
| 184 | | Upside | Map boss gains: | Final Boss drops (2–4) additional Orbs of Unmaking |
| 185 | | Upside | Map boss gains: | Final Boss drops (2–4) additional Cartographer's Chisels |
| 186 | | Upside | Map boss gains: | Final Boss drops (2–4) additional Lesser Eldritch Embers |
| 187 | | Upside | Map boss gains: | Final Boss drops (2–4) additional Greater Eldritch Embers |
| 188 | | Upside | Map boss gains: | Final Boss drops (2–4) additional Grand Eldritch Embers |
| 189 | | Upside | Map boss gains: | Final Boss drops (2–4) additional Eldritch Chaos Orbs |
| 190 | | Upside | Map boss gains: | Final Boss drops (2–4) additional Eldritch Exalted Orbs |
| 191 | | Upside | Map boss gains: | Final Boss drops (2–4) additional Eldritch Orbs of Annulment |
| 192 | | Upside | Map boss gains: | Final Boss drops (2–4) additional Orbs of Annulment |
| 193 | | Upside | Map boss gains: | Final Boss drops (2–4) additional Vaal Orbs |
| 194 | | Upside | Map boss gains: | Final Boss drops (2–4) additional Enkindling Orbs |
| 195 | | Upside | Map boss gains: | Final Boss drops (2–4) additional Instilling Orbs |
| 196 | | Upside | Map boss gains: | Final Boss drops (2–4) additional Orbs of Regret |
| 197 | | Upside | Map boss gains: | Final Boss drops (2–4) additional Glassblower's Baubles |
| 198 | | Upside | Map boss gains: | Final Boss drops (2–4) additional Gemcutter's Prisms |
| 199 | | Upside | Map boss gains: | Final Boss drops (2–4) additional Chaos Orbs |
| 200 | | Upside | Eldritch Minions gain: | (1.6–3.2)% chance to drop an additional Divine Orb |
| 201 | | Upside | Eldritch Minions gain: | (1.6–3.2)% chance to drop an additional Awakened Sextant |
| 202 | | Upside | Eldritch Minions gain: | (1.6–3.2)% chance to drop an additional Orb of Binding |
| 203 | | Upside | Eldritch Minions gain: | (1.6–3.2)% chance to drop an additional Orb of Horizons |
| 204 | | Upside | Eldritch Minions gain: | (1.6–3.2)% chance to drop an additional Orb of Unmaking |
| 205 | | Upside | Eldritch Minions gain: | (1.6–3.2)% chance to drop an additional Cartographer's Chisel |
| 206 | | Upside | Eldritch Minions gain: | (1.6–3.2)% chance to drop an additional Lesser Eldritch Ember |
| 207 | | Upside | Eldritch Minions gain: | (1.6–3.2)% chance to drop an additional Greater Eldritch Ember |
| 208 | | Upside | Eldritch Minions gain: | (1.6–3.2)% chance to drop an additional Grand Eldritch Ember |
| 209 | | Upside | Eldritch Minions gain: | (1.6–3.2)% chance to drop an additional Eldritch Chaos Orb |
| 210 | | Upside | Eldritch Minions gain: | (1.6–3.2)% chance to drop an additional Eldritch Exalted Orb |
| 211 | | Upside | Eldritch Minions gain: | (1.6–3.2)% chance to drop an additional Eldritch Orb of Annulment |
| 212 | | Upside | Eldritch Minions gain: | (1.6–3.2)% chance to drop an additional Orb of Annulment |
| 213 | | Upside | Eldritch Minions gain: | (1.6–3.2)% chance to drop an additional Vaal Orb |
| 214 | | Upside | Eldritch Minions gain: | (1.6–3.2)% chance to drop an additional Enkindling Orb |
| 215 | | Upside | Eldritch Minions gain: | (1.6–3.2)% chance to drop an additional Instilling Orb |
| 216 | | Upside | Eldritch Minions gain: | (1.6–3.2)% chance to drop an additional Orb of Regret |
| 217 | | Upside | Eldritch Minions gain: | (1.6–3.2)% chance to drop an additional Glassblower's Bauble |
| 218 | | Upside | Eldritch Minions gain: | (1.6–3.2)% chance to drop an additional Gemcutter's Prism |
| 219 | | Upside | Eldritch Minions gain: | (1.6–3.2)% chance to drop an additional Chaos Orb |
| 220 | | Upside | Eldritch Minions gain: | (1.6–3.2)% chance to drop an additional Rusted Bestiary Scarab |
| 221 | | Upside | Eldritch Minions gain: | (1.6–3.2)% chance to drop an additional Polished Bestiary Scarab |
| 222 | | Upside | Eldritch Minions gain: | (1.6–3.2)% chance to drop an additional Gilded Bestiary Scarab |
| 223 | | Upside | Eldritch Minions gain: | (1.6–3.2)% chance to drop an additional Rusted Torment Scarab |
| 224 | | Upside | Eldritch Minions gain: | (1.6–3.2)% chance to drop an additional Polished Torment Scarab |
| 225 | | Upside | Eldritch Minions gain: | (1.6–3.2)% chance to drop an additional Gilded Torment Scarab |
| 226 | | Upside | Eldritch Minions gain: | (1.6–3.2)% chance to drop an additional Rusted Metamorph Scarab |
| 227 | | Upside | Eldritch Minions gain: | (1.6–3.2)% chance to drop an additional Polished Metamorph Scarab |
| 228 | | Upside | Eldritch Minions gain: | (1.6–3.2)% chance to drop an additional Gilded Metamorph Scarab |
| 229 | | Upside | Eldritch Minions gain: | (1.6–3.2)% chance to drop an additional Rusted Blight Scarab |
| 230 | | Upside | Eldritch Minions gain: | (1.6–3.2)% chance to drop an additional Polished Blight Scarab |
| 231 | | Upside | Eldritch Minions gain: | (1.6–3.2)% chance to drop an additional Gilded Blight Scarab |
| 232 | | Upside | Eldritch Minions gain: | (1.6–3.2)% chance to drop an additional Rusted Reliquary Scarab |
| 233 | | Upside | Eldritch Minions gain: | (1.6–3.2)% chance to drop an additional Polished Reliquary Scarab |
| 234 | | Upside | Eldritch Minions gain: | (1.6–3.2)% chance to drop an additional Gilded Reliquary Scarab |
| 235 | | Upside | Eldritch Minions gain: | (1.6–3.2)% chance to drop an additional Rusted Divination Scarab |
| 236 | | Upside | Eldritch Minions gain: | (1.6–3.2)% chance to drop an additional Polished Divination Scarab |
| 237 | | Upside | Eldritch Minions gain: | (1.6–3.2)% chance to drop an additional Gilded Divination Scarab |
| 238 | | Upside | Eldritch Minions gain: | (1.6–3.2)% chance to drop an additional Rusted Shaper Scarab |
| 239 | | Upside | Eldritch Minions gain: | (1.6–3.2)% chance to drop an additional Polished Shaper Scarab |
| 240 | | Upside | Eldritch Minions gain: | (1.6–3.2)% chance to drop an additional Gilded Shaper Scarab |
| 241 | | Upside | Eldritch Minions gain: | (1.6–3.2)% chance to drop an additional Rusted Cartography Scarab |
| 242 | | Upside | Eldritch Minions gain: | (1.6–3.2)% chance to drop an additional Polished Cartography Scarab |
| 243 | | Upside | Eldritch Minions gain: | (1.6–3.2)% chance to drop an additional Gilded Cartography Scarab |
| 244 | | Upside | Eldritch Minions gain: | (1.6–3.2)% chance to drop an additional Divination Card which rewards a Unique Item |
| 245 | | Upside | Eldritch Minions gain: | (1.6–3.2)% chance to drop an additional Divination Card which rewards a Unique Weapon |
| 246 | | Upside | Eldritch Minions gain: | (1.6–3.2)% chance to drop an additional Divination Card which rewards a Unique Armour |
| 247 | | Upside | Eldritch Minions gain: | (1.6–3.2)% chance to drop an additional Divination Card which rewards Unique Jewellery |
| 248 | | Upside | Eldritch Minions gain: | (1.6–3.2)% chance to drop an additional Divination Card which rewards a Corrupted Unique Item |
| 249 | | Upside | Eldritch Minions gain: | (1.6–3.2)% chance to drop an additional Divination Card which rewards a Map |
| 250 | | Upside | Eldritch Minions gain: | (1.6–3.2)% chance to drop an additional Divination Card which rewards a Unique Map |
| 251 | | Upside | Eldritch Minions gain: | (1.6–3.2)% chance to drop an additional Divination Card which rewards a Corrupted Item |
| 252 | | Upside | Map boss gains: | Final Boss drops (2–4) additional Rusted Bestiary Scarabs |
| 253 | | Upside | Map boss gains: | Final Boss drops (2–4) additional Polished Bestiary Scarabs |
| 254 | | Upside | Map boss gains: | Final Boss drops (2–4) additional Gilded Bestiary Scarabs |
| 255 | | Upside | Map boss gains: | Final Boss drops (2–4) additional Rusted Torment Scarabs |
| 256 | | Upside | Map boss gains: | Final Boss drops (2–4) additional Polished Torment Scarabs |
| 257 | | Upside | Map boss gains: | Final Boss drops (2–4) additional Gilded Torment Scarabs |
| 258 | | Upside | Map boss gains: | Final Boss drops (2–4) additional Rusted Metamorph Scarabs |
| 259 | | Upside | Map boss gains: | Final Boss drops (2–4) additional Polished Metamorph Scarabs |
| 260 | | Upside | Map boss gains: | Final Boss drops (2–4) additional Gilded Metamorph Scarabs |
| 261 | | Upside | Map boss gains: | Final Boss drops (2–4) additional Rusted Blight Scarabs |
| 262 | | Upside | Map boss gains: | Final Boss drops (2–4) additional Polished Blight Scarabs |
| 263 | | Upside | Map boss gains: | Final Boss drops (2–4) additional Gilded Blight Scarabs |
| 264 | | Upside | Map boss gains: | Final Boss drops (2–4) additional Rusted Reliquary Scarabs |
| 265 | | Upside | Map boss gains: | Final Boss drops (2–4) additional Polished Reliquary Scarabs |
| 266 | | Upside | Map boss gains: | Final Boss drops (2–4) additional Gilded Reliquary Scarabs |
| 267 | | Upside | Map boss gains: | Final Boss drops (2–4) additional Rusted Divination Scarabs |
| 268 | | Upside | Map boss gains: | Final Boss drops (2–4) additional Polished Divination Scarabs |
| 269 | | Upside | Map boss gains: | Final Boss drops (2–4) additional Gilded Divination Scarabs |
| 270 | | Upside | Map boss gains: | Final Boss drops (2–4) additional Rusted Shaper Scarabs |
| 271 | | Upside | Map boss gains: | Final Boss drops (2–4) additional Polished Shaper Scarabs |
| 272 | | Upside | Map boss gains: | Final Boss drops (2–4) additional Gilded Shaper Scarabs |
| 273 | | Upside | Map boss gains: | Final Boss drops (2–4) additional Rusted Cartography Scarabs |
| 274 | | Upside | Map boss gains: | Final Boss drops (2–4) additional Polished Cartography Scarabs |
| 275 | | Upside | Map boss gains: | Final Boss drops (2–4) additional Gilded Cartography Scarabs |
| 276 | | Upside | Map boss gains: | Final Boss drops (2–4) additional Divination Cards which reward a Unique Item |
| 277 | | Upside | Map boss gains: | Final Boss drops (2–4) additional Divination Cards which reward a Unique Weapon |
| 278 | | Upside | Map boss gains: | Final Boss drops (2–4) additional Divination Cards which reward a Unique Armour |
| 279 | | Upside | Map boss gains: | Final Boss drops (2–4) additional Divination Cards which reward Unique Jewellery |
| 280 | | Upside | Map boss gains: | Final Boss drops (2–4) additional Divination Cards which reward a Corrupted Unique Item |
| 281 | | Upside | Map boss gains: | Final Boss drops (2–4) additional Divination Cards which reward a Map |
| 282 | | Upside | Map boss gains: | Final Boss drops (2–4) additional Divination Cards which reward a Unique Map |
| 283 | | Upside | Map boss gains: | Final Boss drops (2–4) additional Divination Cards which reward a Corrupted Item |
| 284 | | Upside | Player gains: | Basic Currency Items dropped by slain Enemies have (15–30)% chance to be Duplicated |
| 285 | | Upside | Player gains: | Unique Items dropped by slain Enemies have (15–30)% chance to be Duplicated |
| 286 | | Upside | Player gains: | Scarabs dropped by slain Enemies have (15–30)% chance to be Duplicated |
| 287 | | Upside | Player gains: | Maps dropped by slain Enemies have (15–30)% chance to be Duplicated |
| 288 | | Upside | Player gains: | Divination Cards dropped by slain Enemies have (15–30)% chance to be Duplicated |
| 289 | | Upside | Player gains: | (10–30)% increased Quantity of Items found in this Area (15–35)% increased Rarity of Items found in this Area |
| 290 | Upside | Eldritch Minions gain: | (1.2–2.4)% chance to drop an additional Lesser Eldritch Ichor | |
| 291 | Upside | Eldritch Minions gain: | (1.2–2.4)% chance to drop an additional Greater Eldritch Ichor | |
| 292 | Upside | Eldritch Minions gain: | (1.2–2.4)% chance to drop an additional Grand Eldritch Ichor | |
| 293 | Upside | Map boss gains: | Final Boss drops 1 additional Lesser Eldritch Ichor | |
| 294 | Upside | Map boss gains: | Final Boss drops 1 additional Greater Eldritch Ichor | |
| 295 | Upside | Map boss gains: | Final Boss drops 1 additional Grand Eldritch Ichor | |
| 296 | Upside | Player gains: | Basic Currency Items dropped by slain Enemies have (10–15)% chance to be Duplicated | |
| 297 | Upside | Player gains: | Gems dropped by slain Enemies have (10–15)% chance to be Duplicated | |
| 298 | Upside | Player gains: | Maps dropped by slain Enemies have (10–15)% chance to be Duplicated | |
| 299 | Upside | Player gains: | (10–15)% increased Quantity of Items found in this Area | |
| 300 | Upside | Player gains: | (5–10)% increased Rarity of Items found in this Area | |
| 301 | Upside | Player gains: | (8–12)% increased Experience gain | |
| 302 | Upside | Eldritch Minions gain: | (1.2–2.4)% chance to drop an additional Lesser Eldritch Ember | |
| 303 | Upside | Eldritch Minions gain: | (1.2–2.4)% chance to drop an additional Greater Eldritch Ember | |
| 304 | Upside | Eldritch Minions gain: | (1.2–2.4)% chance to drop an additional Grand Eldritch Ember | |
| 305 | Upside | Map boss gains: | Final Boss drops 1 additional Lesser Eldritch Ember | |
| 306 | Upside | Map boss gains: | Final Boss drops 1 additional Greater Eldritch Ember | |
| 307 | Upside | Map boss gains: | Final Boss drops 1 additional Grand Eldritch Ember | |
| 308 | Upside | Player gains: | Basic Currency Items dropped by slain Enemies have (10–15)% chance to be Duplicated | |
| 309 | Upside | Player gains: | Gems dropped by slain Enemies have (10–15)% chance to be Duplicated | |
| 310 | Upside | Player gains: | Maps dropped by slain Enemies have (10–15)% chance to be Duplicated | |
| 311 | Upside | Player gains: | (10–15)% increased Quantity of Items found in this Area | |
| 312 | Upside | Player gains: | (5–10)% increased Rarity of Items found in this Area | |
| 313 | Upside | Player gains: | (8–12)% increased Experience gain |
Buy PoE 2 Currency Cheap
- Buy PoE 2 Currency Instant Delivery (6% off coupon: z123). Path of Exile item and currency. Payment: PayPal, Skrill, Cryptocurrencies.
PoE 3.21: The Eldritch Altar modifier that causes you to have reduced Cooldown Recovery Rate per Power Charge has been replaced with one that causes you to have reduced Critical Strike Multiplier per Power Charge.
Eldritch Altars 3.20 Patch Notes
Problem:
Eldritch Altars are currently too rewarding, so much so that they create a disincentive for any out-of-map gameplay unless it is comparably rewarding.
Solution:
We've lightly nerfed their total rewards and updated them in various other ways that we'll outline below. While it is fair to say that you can no longer min-max into rewards in such an extreme way, they will still be quite rewarding.
Specifics:
- We have removed some reward types from the choices available at Altars, such as duplicate gems, influenced items, unique items, gems and maps. This means that other reward types will take their place and naturally be more common.
- Altars no longer offer a choice for "Basic Currency" but instead offer choices for specific currency. For example, instead of seeing Altars that say "Map Boss Drops Three Basic Currency Items", you'll now see Altars that say things like "Map Boss Drops Three Vaal Orbs". Currency Rewards from Influenced Minions no longer drop in stacks larger than 1.
- Some of the more common but very low value rewards such as Orbs of Augmentation, Orbs of Transmutation, Blacksmith's Whetstones, Armourer Scraps, etc can no longer be offered as part of the Basic Currency reward.
- Similarly, instead of offering choices for Scarabs or Divination Cards as a category, they're now more specific. For example, rather than simply "Divination Cards", you'll now see things like "Divination Cards which reward Unique Jewellery".
- These specific Currency, Scarab and Divination Card rewards will be split so that they're exclusive to one Altar type. This means that if you're targeting a specific reward type, you'll be able to figure out which influence type to invest into in order to farm that reward.
- The rewards that still remain are Currency, Scarabs, Divination Cards, Duplicate (Currency, Uniques, Scarabs, Maps, Divination Cards) and Quantity / Rarity.
- To give you a specific example, if you run maps influenced by the Eater of Worlds, you'll see Divine Orbs from the 'Basic Currency Reward' more than twice as often as before.
- On the whole, Scarabs will be offered a lot less than before from Altars. However, we don't want them to be too scarce in general. As such, we're adding Rusted Scarabs to the core drop pool. We are also adding a vendor recipe that can be used to upgrade Scarabs between tiers using the usual 3:1 ratio (up to Gilded Scarabs). We are adding an 'Upgrade' button in the Fragment Stash Tab that can upgrade your Scarabs in this way, similar to the upgrade function in the Essence Stash Tab.
Problem:
- Players currently have an incentive to skip past all regular map monsters and kill the map boss first. The motivation for doing so is that Altars which offer rewards affecting the map boss are less desirable. By killing the boss first, you eliminate these options from your map altars, which makes them more rewarding.
- This is one of those cases where the most efficient and rewarding gameplay strategy undermines the expected gameplay loop and encourages players to do things that aren't really fun.
We are making a few numerical changes to Altar rewards so that choices that affect Boss Drops or Influenced Monster Drops are more comparably valuable, though Boss Drop rewards will be slightly better on average than Eldritch Minion rewards.
Problem:
Eldritch influence added a huge amount of extra monsters to maps. This is one of the main factors that makes it harder for players to justify doing Maven-witnessed maps or non-map content, as their rewards struggle to compete.
Solution:
- The amount of Influence Packs spawned by Eldritch-Influenced Maps has been reduced by around a third but the chance of Influence Altars spawning has been increased by about half to somewhat offset this. Previously, Eldritch-Influenced Maps would always spawn exactly 60 packs within a map. They will now spawn somewhere between 20 and 60 packs per map. It's a large enough variance that the difference should be notable. It should also encourage more decision making around Altars. For example, if you intuit that it may be a 20 pack map, you might be more inclined to pick more Map Boss modifiers as there won't be as many Influence Monsters in the map to get other rewards from.
- While we were working on this, we took the opportunity to change the pack spawning behaviour from Influence so that a given area will only have three different types of monster packs. Previously, there were eight pack types that could be spawned per influence type and it randomly chose which pack type to spawn. This is a relatively small change that won't have a significant effect during gameplay. The goal was simply to give some identity to an area and give you a slightly better idea of what to expect during gameplay.
Problem:
The Wrath of the Cosmos Keystone encouraged players to risk a level of danger that was outside their capability because of how valuable its rewards were. In some cases, it made more sense to die a few times per map than forgo the level of rewards this keystone offered. This is not ideal, to say the least.
Solution:
We have redesigned this keystone. It now has "Eldritch Altars Influenced by The Searing Exarch have 50% chance to have an additional Upside" and "Eldritch Altars Influenced by The Searing Exarch which have an additional Upside have 100% increased Effect of Downsides." It no longer has any of its former stats. The overall risk vs. reward nature of this keystone is still in place, it's just a lot less intense now.
Problem:
It shouldn't be necessary to travel to the opposite influence cluster in order to maximise your rewards from one specific influence altar.
Solution:
- Alongside the change to Wrath of the Cosmos above, we have also changed the Eldritch Gaze keystone so it only affects Altars in maps influenced by the Eater of Worlds. The main reason for this is that we want you to invest Atlas Passives into the influence type that you're currently farming. The small passives near these keystones are already specific to influence types and it's nice and tidy to keep things consistent in this way.
- This is a nerf to how much you can scale your rewards from these keystones, if you were one of the subset of players who were taking both keystones in the past.
Conclusion:
Altar rewards are a bit more sensible now, through clearer reward types and by toning down the extreme levels of giftyness. We've worked towards making it so that players don't feel compelled to rush straight to map bosses in order to maximise their rewards. We've also updated the Wrath of the Cosmos keystone to be a bit less brutal and a bit less rewarding. The intent wasn't to gut these systems, just slightly reduce their overall potency. They should still be valuable sources of rewards.
Balance Manifesto: Eldritch Altars 3.20
In the Forbidden Sanctum expansion, we're making a number of changes to Eldritch Altars, specifically to their rewards, the monster packs they spawn and the incentives for rushing to map bosses before completing the rest of the map. In addition, we are adding a chance for Maven-witnessed Map Bosses to drop an Awakened Gem (inclusive of the Awakened Gems that are typically exclusive to Maven herself). The overarching aim of these changes is to try to reach a point where the choice between running Maven-witnessed Maps or Eldritch Influence Maps is closer in value while still retaining the gameplay feeling you've come to expect from Eldritch Altars.
TLDR:
- Altars no longer offer some reward types like gems, influenced items, unique items or maps.
- The "Basic Currency" reward has been split up into specific currency rewards. For example, they now have "Map Boss Drops Three Vaal Orbs" instead of "Map Boss Drops Three Basic Currency Items".
- Altars no longer offer some basic rewards like Orbs of Augmentation, Orbs of Transmutation, Blacksmith's Whetstones, Armourer Scraps etc.
- Currency drop weights are still adhered to for these rewards so with the removal of basic rewards, you'll see good currency a lot more often.
- Scarabs and Divination Cards have also been split into specific rewards. For example, rather than simply "Divination Cards", you'll now see things like "Divination Cards which reward Unique Jewellery".
- These specific rewards will be split so that they're exclusive to one Altar type, to allow target farming of these rewards.
- Scarabs are offered a lot less from Altars, but we don't want them to be too scarce as a whole. To help balance this out, we're adding Rusted Scarabs to the core drop pool.
- We're also adding a vendor recipe that can be used to upgrade Scarabs between tiers using the usual 3:1 ratio (up to Gilded Scarabs). We are also adding an 'Upgrade' button in the Fragment Stash Tab that can upgrade your Scarabs, like the one in the Essence tab.
- The amount of Influence Packs spawned by Altars has been reduced by 33% but the chance of Influence Altars spawning has been increased by 50% to offset this.
- We are making changes so that Altar choices that affect Boss Drops or Influenced Monster Drops are comparably valuable.
- We've redesigned the Wrath of the Cosmos keystone.
- We've changed the Wrath of the Cosmos and Eldritch Gaze keystones to only apply in maps affected by their respective influence.
- Not directly related to Altars, but related to the choice of what type of influence you run on your maps, we are adding a chance for Maven-witnessed Map Bosses to drop an Awakened Gem, inclusive of the Awakened Gems that are typically exclusive to Maven herself.
Altar Rewards
Eldritch Altars are currently too rewarding, so much so that they create a disincentive for any out-of-map gameplay unless it is comparably rewarding. We've lightly nerfed their total rewards and updated them in various other ways that we'll outline below. While it is fair to say that you can no longer min-max into rewards in such an extreme way, they will still be quite rewarding.We have removed some reward types from the choices available at Altars, such as duplicate gems, influenced items, unique items, gems and maps. This means that other reward types will take their place and naturally be more common.
Altars no longer offer a choice for "Basic Currency" but instead offer choices for specific currency. For example, instead of seeing Altars that say "Map Boss Drops Three Basic Currency Items", you'll now see Altars that say things like "Map Boss Drops Three Vaal Orbs". Currency Rewards from Influenced Minions no longer drop in stacks larger than 1.
Some of the more common but very low value rewards such as Orbs of Augmentation, Orbs of Transmutation, Blacksmith's Whetstones, Armourer Scraps, etc can no longer be offered as part of the Basic Currency reward.
Similarly, instead of offering choices for Scarabs or Divination Cards as a category, they're now more specific. For example, rather than simply "Divination Cards", you'll now see things like "Divination Cards which reward Unique Jewellery".
These specific Currency, Scarab and Divination Card rewards will be split so that they're exclusive to one Altar type. This means that if you're targeting a specific reward type, you'll be able to figure out which influence type to invest into in order to farm that reward.
The rewards that still remain are Currency, Scarabs, Divination Cards, Duplicate (Currency, Uniques, Scarabs, Maps, Divination Cards) and Quantity / Rarity.
To give you a specific example, if you run maps influenced by the Eater of Worlds, you'll see Divine Orbs from the 'Basic Currency Reward' more than twice as often as before.
On the whole, Scarabs will be offered a lot less than before from Altars. However, we don't want them to be too scarce in general. As such, we're adding Rusted Scarabs to the core drop pool. We are also adding a vendor recipe that can be used to upgrade Scarabs between tiers using the usual 3:1 ratio (up to Gilded Scarabs). We are adding an 'Upgrade' button in the Fragment Stash Tab that can upgrade your Scarabs in this way, similar to the upgrade function in the Essence Stash Tab.
Boss Rushing
Players currently have an incentive to skip past all regular map monsters and kill the map boss first. The motivation for doing so is that Altars which offer rewards affecting the map boss are less desirable. By killing the boss first, you eliminate these options from your map altars, which makes them more rewarding.This is one of those cases where the most efficient and rewarding gameplay strategy undermines the expected gameplay loop and encourages players to do things that aren't really fun.
We are making a few numerical changes to Altar rewards so that choices that affect Boss Drops or Influenced Monster Drops are more comparably valuable, though Boss Drop rewards will be slightly better on average than Eldritch Minion rewards.
Altar Monster Packs
The amount of Influence Packs spawned by Eldritch-Influenced Maps has been reduced by around a third but the chance of Influence Altars spawning has been increased by about half to somewhat offset this. We're making this change to add some variance to Altar gameplay. Previously, Eldritch-Influenced Maps would always spawn exactly 60 packs within a map. They will now spawn somewhere between 20 and 60 packs per map. It's a large enough variance that the difference should be notable. It should also encourage more decision making around Altars. For example, if you intuit that it may be a 20 pack map, you might be more inclined to pick more Map Boss modifiers as there won't be as many Influence Monsters in the map to get other rewards from.While we were working on this, we took the opportunity to change the pack spawning behaviour from Influence so that a given area will only have three different types of monster packs. Previously, there were eight pack types that could be spawned per influence type and it randomly chose which pack type to spawn. This is a relatively small change that won't have a significant effect during gameplay. The goal was simply to give some identity to an area and give you a slightly better idea of what to expect during gameplay.
Wrath of the Cosmos
The Wrath of the Cosmos Keystone encouraged players to risk a level of danger that was outside their capability because of how valuable its rewards were. In some cases, it made more sense to die a few times per map than forgo the level of rewards this keystone offered. This is not ideal, to say the least.We have redesigned this keystone. It now only affects Altars in maps influenced by the Searing Exarch. Each Altar now has a 50% chance for an additional upside. Altars with an additional upside will have their downside effect increased by 100%. The overall risk vs. reward nature of this keystone is still in place, it's just a lot less intense now.
The Eldritch Gaze keystone now only affects Altars in maps influenced by the Eater of Worlds. The main reason for this is that we want you to invest Atlas Passives into the influence type that you're currently farming. It feels wrong to have to get the passives from the opposite influence cluster in order to maximise the rewards you get from the influence type that you're currently farming. The small passives near these keystones are already specific to influence types and it's nice and tidy to keep things consistent in this way.
Just to explicitly call a spade a spade, this is a nerf to how much you can scale your rewards from these keystones, if you were one of the subset of players who were taking both keystones in the past.
Conclusion
Altar rewards are a bit more sensible now, through clearer reward types and by toning down the extreme levels of giftyness. We've worked towards making it so that players don't feel compelled to rush straight to map bosses in order to maximise their rewards. We've also updated the Wrath of the Cosmos keystone to be a bit less brutal and a bit less rewarding. The intent wasn't to gut these systems, just slightly reduce their overall potency. They should still be valuable sources of rewards.User Interface Changes 3.20
Added a display that details the effects of all Eldritch Altars that have been selected in an area.
Can we get the Altar mods on the Map Mod UI?
Yes, we've added this in 3.20.
Can you make Altars more readable in the heat of combat?
We've discussed community feedback around this, specifically to consider options around instance-pausing, colour indicators or reward symbols. Each of these options has their own drawbacks so we won't be making any changes on this front for now. The best thing to do is to finish killing the surrounding monsters before reading the Altar.
How common are Awakened Gems from the Maven?
When you kill the Maven herself, the chance of getting an Awakened Gem is quite common. The drop chance from Maven-witnessed map bosses is a lot lower than this because these fights occur more often. The goal is that they're common enough that it feels worthwhile running Maven-witnessed maps while not having Awakened Gems feel too common and significantly lowering their value.
How common are Rusted Scarabs in the core drop pool?
The exact weighting hasn't been finalised yet but currently, we're looking at them being slightly less common than Rogue's Markers. Note that that is on top of other sources of Scarabs like Altars, Delirium, Betrayal, etc. (As we mentioned, these drop less frequently from Altars in 3.20, but other sources haven't changed).
Why does currency drop in stacks of one now?
This change only applies to rewards from Influenced Monsters. Altar rewards that say things like "Map Boss Drops Three Vaal Orbs" will still drop in stacks of three requiring one click for pickup.
One of the goals of the Altar changes from the outset was to retain the feel of Altars such that the gameplay feels familiar, as we're generally happy with how that feels to play. Part of retaining this means we want to keep the frequency of encountering Eldritch Altars relatively common. If we want to give you Altars relatively often, it means we're giving out rewards relatively often so one of the ways of balancing this is to make the stack sizes of those rewards lower.
Most Currency rewards from Influenced Monsters already dropped in stacks of one, but there were a few outliers (most notably Map Currency rewards). The outliers are generally the only thing that is changing here in terms of stack size.
Are you nerfing Heist and Expedition rewards?
We have no plans regarding this.
PoE Eldritch Altars Mods
| # | Side | Choice Type | Eldritch Altars Mods | Category |
|---|---|---|---|---|
| 1 | Downside | Map boss gains: | +10% to maximum Cold Resistance +80% to Cold Resistance +10% to maximum Lightning Resistance +80% to Lightning Resistance |
 |
| 2 | Downside | Map boss gains: | (50–70)% additional Physical Damage Reduction | |
| 3 | Downside | Map boss gains: | All Damage with Hits can Chill | |
| 4 | Downside | Map boss gains: | Hits always Shock All Damage can Shock |
|
| 5 | Downside | Map boss gains: | Prevent +(20–30)% of Suppressed Spell Damage +100% chance to Suppress Spell Damage |
|
| 6 | Downside | Map boss gains: | Gain (50–80)% of Physical Damage as Extra Damage of a random Element Damage Penetrates (15–25)% of Enemy Elemental Resistances |
|
| 7 | Downside | Map boss gains: | Gain (50–80)% of Physical Damage as Extra Cold Damage Cover Enemies in Frost on Hit |
|
| 8 | Downside | Map boss gains: | 100% Global chance to Blind Enemies on hit (100–200)% increased Blind Effect |
|
| 9 | Downside | Map boss gains: | Gain (50–70)% of Maximum Life as Extra Maximum Energy Shield | |
| 10 | Downside | Map boss gains: | Gain (70–130)% of Physical Damage as Extra Cold Damage All Damage with Hits can Chill |
|
| 11 | Downside | Map boss gains: | Hits always Shock Gain (70–130)% of Physical Damage as Extra Lightning Damage All Damage can Shock |
|
| 12 | Downside | Map boss gains: | Eldritch Tentacles | |
| 13 | Downside | Eldritch Minions gain: | Overwhelm (50–80)% Physical Damage Reduction | |
| 14 | Downside | Eldritch Minions gain: | Skills fire (3–5) additional Projectiles | |
| 15 | Downside | Eldritch Minions gain: | (30–50)% increased Attack Speed (30–50)% increased Cast Speed (30–50)% increased Movement Speed |
|
| 16 | Downside | Eldritch Minions gain: | +10% to maximum Cold Resistance +80% to Cold Resistance +10% to maximum Lightning Resistance +80% to Lightning Resistance |
|
| 17 | Downside | Eldritch Minions gain: | (50–80)% additional Physical Damage Reduction | |
| 18 | Downside | Eldritch Minions gain: | Prevent +(20–30)% of Suppressed Spell Damage +100% chance to Suppress Spell Damage |
|
| 19 | Downside | Eldritch Minions gain: | 100% chance to remove a random Charge from Enemy on Hit | |
| 20 | Downside | Eldritch Minions gain: | Drops Chilled Ground on Death, lasting 3 seconds | |
| 21 | Downside | Eldritch Minions gain: | 100% chance to create Shocked Ground on Death, lasting 3 seconds | |
| 22 | Downside | Eldritch Minions gain: | Inflict 1 Grasping Vine on Hit | |
| 23 | Downside | Eldritch Minions gain: | Curse Enemies with Punishment on Hit | |
| 24 | Downside | Eldritch Minions gain: | Gain (70–130)% of Physical Damage as Extra Lightning Damage | |
| 25 | Downside | Eldritch Minions gain: | Gain (70–130)% of Physical Damage as Extra Cold Damage | |
| 26 | Downside | Player gains: | (-60–-40)% to Cold Resistance (-60–-40)% to Lightning Resistance |
|
| 27 | Downside | Player gains: | (-60–-40)% additional Physical Damage Reduction | |
| 28 | Downside | Player gains: | (30–50)% reduced Defences per Frenzy Charge | |
| 29 | Downside | Player gains: | (10–20)% reduced Recovery Rate of Life, Mana and Energy Shield per Endurance Charge | |
| 30 | Downside | Player gains: | (10–20)% reduced Cooldown Recovery Rate per Power Charge | |
| 31 | Downside | Player gains: | (25–35)% chance for Enemies to drop Chilled Ground when Hitting you, no more than once every 2 seconds | |
| 32 | Downside | Player gains: | (25–35)% chance for Enemies to drop Shocked Ground when Hitting you, no more than once every 2 seconds | |
| 33 | Downside | Player gains: | All Damage taken from Hits can Sap you (25–35)% chance to be Sapped when Hit |
|
| 34 | Downside | Player gains: | Nearby Enemies Gain 100% of their Physical Damage as Extra Cold Damage | |
| 35 | Downside | Player gains: | Nearby Enemies Gain 100% of their Physical Damage as Extra Lightning Damage | |
| 36 | Downside | Player gains: | Projectiles are fired in random directions | |
| 37 | Downside | Player gains: | Spell Hits have (25–35)% chance to Hinder you | |
| 38 | Downside | Player gains: | Non-Damaging Ailments you inflict are reflected back to you | |
| 39 | Downside | Player gains: | number of grasping vines to gain every second while stationary [1] | |
| 40 | Downside | Map boss gains: | 100% chance to create Consecrated Ground on Hit, lasting 6 seconds | |
| 41 | Downside | Map boss gains: | +10% to maximum Fire Resistance +80% to Fire Resistance +10% to maximum Chaos Resistance +80% to Chaos Resistance |
|
| 42 | Downside | Map boss gains: | +50000 to Armour | |
| 43 | Downside | Map boss gains: | Gain (50–80)% of Physical Damage as Extra Fire Damage 100% chance to Cover Enemies in Ash on Hit |
|
| 44 | Downside | Map boss gains: | Hits always Ignite All Damage can Ignite |
|
| 45 | Downside | Map boss gains: | Poison on Hit All Damage from Hits can Poison |
|
| 46 | Downside | Map boss gains: | Enemies lose 6 Flask Charges every 3 seconds and cannot gain Flask Charges for 6 seconds after being Hit | |
| 47 | Downside | Map boss gains: | Gain (50–80)% of Physical Damage as Extra Damage of a random Element Damage Penetrates (15–25)% of Enemy Elemental Resistances |
|
| 48 | Downside | Map boss gains: | Your hits inflict Malediction | |
| 49 | Downside | Map boss gains: | Hits always Ignite Gain (70–130)% of Physical Damage as Extra Fire Damage All Damage can Ignite |
|
| 50 | Downside | Map boss gains: | Gain (70–130)% of Physical Damage as Extra Chaos Damage Poison on Hit All Damage from Hits can Poison |
|
| 51 | Downside | Map boss gains: | (100–200)% increased Armour (100–200)% increased Evasion Rating |
|
| 52 | Downside | Map boss gains: | Nearby Enemies are Hindered, with 40% reduced Movement Speed hinder aura behaviour variation [1] |
|
| 53 | Downside | Eldritch Minions gain: | Drops Burning Ground on Death, lasting 3 seconds | |
| 54 | Downside | Eldritch Minions gain: | 100% chance to create Consecrated Ground on Death, lasting 6 seconds | |
| 55 | Downside | Eldritch Minions gain: | Gain (70–130)% of Physical Damage as Extra Damage of a random Element Inflict Fire, Cold, and Lightning Exposure on Hit |
|
| 56 | Downside | Eldritch Minions gain: | Enemies lose 6 Flask Charges every 3 seconds and cannot gain Flask Charges for 6 seconds after being Hit | |
| 57 | Downside | Eldritch Minions gain: | +10% to maximum Fire Resistance +80% to Fire Resistance +10% to maximum Chaos Resistance +80% to Chaos Resistance |
|
| 58 | Downside | Eldritch Minions gain: | +50000 to Armour | |
| 59 | Downside | Eldritch Minions gain: | (70–130)% increased Area of Effect | |
| 60 | Downside | Eldritch Minions gain: | (250–500)% increased Evasion Rating | |
| 61 | Downside | Eldritch Minions gain: | Hits always Ignite All Damage can Ignite |
|
| 62 | Downside | Eldritch Minions gain: | Poison on Hit All Damage from Hits can Poison |
|
| 63 | Downside | Eldritch Minions gain: | Curse Enemies with Vulnerability on Hit | |
| 64 | Downside | Eldritch Minions gain: | Gain (70–130)% of Physical Damage as Extra Chaos Damage | |
| 65 | Downside | Eldritch Minions gain: | Gain (70–130)% of Physical Damage as Extra Fire Damage | |
| 66 | Downside | Player gains: | (-60–-40)% to Fire Resistance (-60–-40)% to Chaos Resistance |
|
| 67 | Downside | Player gains: | -3000 to Armour -3000 to Evasion Rating |
|
| 68 | Downside | Player gains: | (40–60)% reduced Flask Effect Duration (20–40)% increased Flask Charges used |
|
| 69 | Downside | Player gains: | Take 600 Chaos Damage per second during any Flask Effect | |
| 70 | Downside | Player gains: | Spell Hits have (20–30)% chance to Hinder you | |
| 71 | Downside | Player gains: | All Damage taken from Hits can Scorch you (25–35)% chance to be Scorched when Hit |
|
| 72 | Downside | Player gains: | Curses you inflict are reflected back to you | |
| 73 | Downside | Player gains: | (15–20)% chance for Enemies to drop Burning Ground when Hitting you, no more than once every 2 seconds | |
| 74 | Downside | Player gains: | 30% chance to be targeted by a Meteor when you use a Flask | |
| 75 | Downside | Player gains: | Nearby Enemies Gain 100% of their Physical Damage as Extra Fire Damage | |
| 76 | Downside | Player gains: | Nearby Enemies Gain 100% of their Physical Damage as Extra Chaos Damage | |
| 77 | Upside | Map boss gains: | Drops (2–4) additional Items with an Eater of Worlds Implicit Modifier |  |
| 78 | Upside | Map boss gains: | Drops (1–3) additional Eldritch Ichor Currency Item | |
| 79 | Upside | Eldritch Minions gain: | (2–4)% chance to drop an additional Item with an Eater of Worlds Implicit Modifier | |
| 80 | Upside | Eldritch Minions gain: | (1–2)% chance to drop an additional Eldritch Ichor Currency Item | |
| 81 | Upside | Eldritch Minions gain: | (1–2)% chance to drop an additional Eldritch Ember Currency Item | |
| 82 | Upside | Map boss gains: | Drops (2–4) additional Items with a Searing Exarch Implicit Modifier | |
| 83 | Upside | Map boss gains: | Drops (1–3) additional Eldritch Ember Currency Item | |
| 84 | Upside | Eldritch Minions gain: | (1.5–3)% chance to drop an additional Item with a Searing Exarch Implicit Modifier | |
| 85 | Upside | Eldritch Minions gain: | (2–4)% chance to drop an additional Basic Currency Item | |
| 86 | Upside | Eldritch Minions gain: | (2–4)% chance to drop an additional Gem | |
| 87 | Upside | Eldritch Minions gain: | (1–2)% chance to drop an additional Unique Item | |
| 88 | Upside | Eldritch Minions gain: | (1–2)% chance to drop an additional Scarab | |
| 89 | Upside | Eldritch Minions gain: | (2–4)% chance to drop an additional Map Currency Item | |
| 90 | Upside | Eldritch Minions gain: | (2–4)% chance to drop an additional Divination Card | |
| 91 | Upside | Eldritch Minions gain: | (1–2)% chance to drop an additional Map | |
| 92 | Upside | Map boss gains: | Drops (3–5) additional Basic Currency Items | |
| 93 | Upside | Map boss gains: | Drops (3–5) additional Gems | |
| 94 | Upside | Map boss gains: | Drops (1–3) additional Unique Item | |
| 95 | Upside | Map boss gains: | Drops (1–3) additional Scarab | |
| 96 | Upside | Map boss gains: | Drops (3–5) additional Map Currency Items | |
| 97 | Upside | Map boss gains: | Drops (3–5) additional Divination Cards | |
| 98 | Upside | Map boss gains: | Drops an additional Map | |
| 99 | Upside | Player gains: | Basic Currency Items dropped by slain Enemies have (10–20)% chance to be Duplicated | |
| 100 | Upside | Player gains: | Gems dropped by slain Enemies have (10–20)% chance to be Duplicated | |
| 101 | Upside | Player gains: | Unique Items dropped by slain Enemies have (10–20)% chance to be Duplicated | |
| 102 | Upside | Player gains: | Scarabs dropped by slain Enemies have (10–20)% chance to be Duplicated | |
| 103 | Upside | Player gains: | Maps dropped by slain Enemies have (10–20)% chance to be Duplicated | |
| 104 | Upside | Player gains: | Divination Cards dropped by slain Enemies have (10–20)% chance to be Duplicated | |
| 105 | Upside | Player gains: | (10–30)% increased Quantity of Items found in this Area (15–35)% increased Rarity of Items found in this Area |
Use Eldritch Altars Sentinel Challenge
PoE 3.18 Changes
We have rebalanced influence altars in maps. They now feel a lot different than they did in the form they were introduced in Siege of the Atlas. Their downsides now feel more impactful, and they have more diversity of rewards, including new rewards. The intention is to fulfill the original design goal of having an Ultimatum-like choice about whether you want to accept additional challenge for additional reward. We've added better atlas passive tree support for them, including two keystones that can affect them.
- Eldritch Altars have been rebalanced, their downsides now feel more impactful and they now provide a wider diversity of rewards.
- The Eldritch Altar option that causes Scarabs dropped by slain Enemies to have a chance to be Duplicated has been replaced with a new option that causes Divination Cards dropped by slain Enemies to have a chance to be Duplicated.
- The Eldritch Altar option that causes Eldritch Minions to drop Burning Ground on Death no longer scales off of the main hand attack damage of the Monster, as this could result in highly variable amounts of Damage over Time dealt by the ground effect. This change has been applied to all cases of this in the game, notably Burning Ground on Death from Flame Helions and Caustic Clouds on Death from certain Zombies.
Altars(Siege of the Atlas)
In Influenced maps, as you defeat enemies, altars themed around The Searing Exarch or The Eater of Worlds occasionally appear where you killed those enemies. These Altars will give you a choice between two options which can either modify your character, Influenced Monsters, or the Boss of the Map by increasing rewards but also increasing difficulty.
You can encounter multiple altars per area so sometimes you can drastically affect the difficulty and rewards of a map as you play through it.
It's also fine to ignore it and choose not to increase the difficulty and reward of the map if you feel that it is already challenging enough.
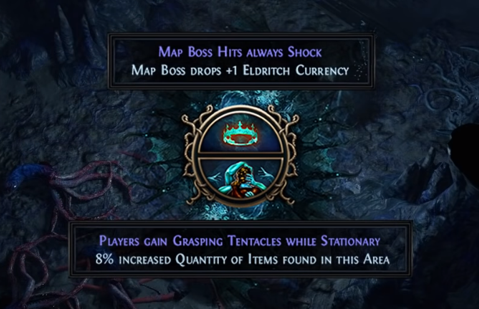
An example of a modification is altering the map boss so that all of its damage shocks, but also causing it to drop an additional Eldritch Currency Item as a reward.
Acutely Activated Altars
Use at least three Eldritch Altars in a single Map the specified number of times.
Path of Exile Guides & Tips
- Vast Power PoE
- Ambush PoE Skill Gem Build 3.15
- PoE Lex Proxima 3.13 Atlas Passive Tree Skills Echoes
- Contract: Heart of Glory Familial Contract Unique 3.12
- PoE Ultimatum League 3.14 Guide 2021 – Path of Exile
- PoE Prime Chaotic Resonator Guide
- PoE Caster Modifiers List Harvest, Catalyst
- Vanity Divination Card PoE – Farming Tabula Rasa
- The Gladiator Divination Card PoE – Farming Nightmare Bascinet
- Pure Aptitude PoE
- D2R Poison Charms
- Sacred Lands PoE Ritual Atlas Passives 3.14
- Perpetual Motion PoE
- Forgotten Fragment of Loss FFXIV
- Adamant PoE