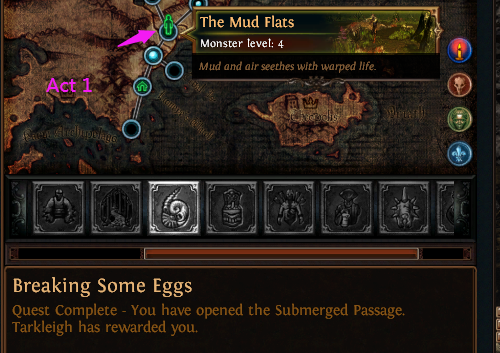
Breaking Some Eggs
Breaking Some Eggs Guide
| Quest Location | The Mud Flats (Act 1) |
|---|---|
| Start | Find a Rhoa Nest and pick up a glyph(location: The Mud Flats, Act 1) |
| Objective | Travel to Mud Flats and open The Submerged Passage |
| Completion | Talk to Tarkleigh(location: Lioneye's Watch, Act 1) |
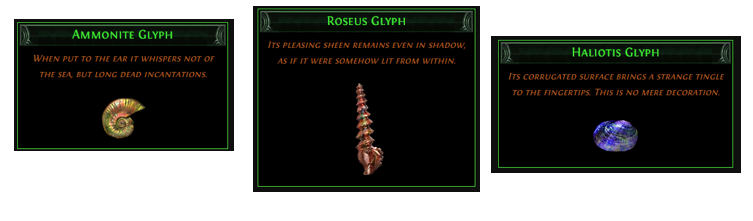
| Key Item | Ammonite Glyph, Haliotis Glyph, and Roseus Glyph |
Quest location
The Mud Flats is an area in Act 1. This area does not have a waypoint and is connected to The Coast, The Fetid Pool, and The Submerged Passage.
The area has three Rhoa Nests that contain the quest items Ammonite Glyph, Haliotis Glyph, and Roseus Glyph. The nests are connected by a network of small streams that lead to the ocean.
Buy PoE Currency Cheap
- PoE Currency . Path of Exile item and currency. Payment: PayPal, Skrill, Cryptocurrencies.
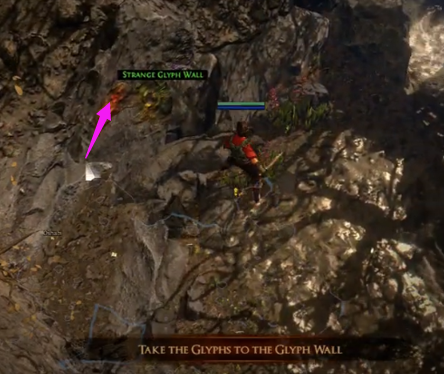
Pick up three Glyphs and take to the Glyph Wall
- Location: The Mud Flats (Act 1)
- Key item: Ammonite Glyph, Haliotis Glyph, and Roseus Glyph
(1) Open a Rhoa Nest and pick up a glyph to start this quest.
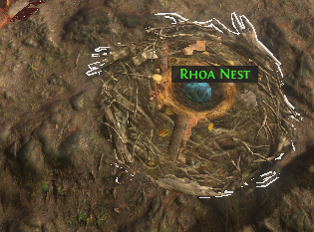
(2) Find 3 glyphs in Rhoa Nest: Ammonite Glyph, Haliotis Glyph, and Roseus Glyph
(3) Take the 3 Glyphs to the Glyph Wall
In order to unlock The Submerged Passage entrance you must take the three glyphs to the glyph wall.
(4) Open The Submerged Passage. Talk to Tarkleigh for your reward
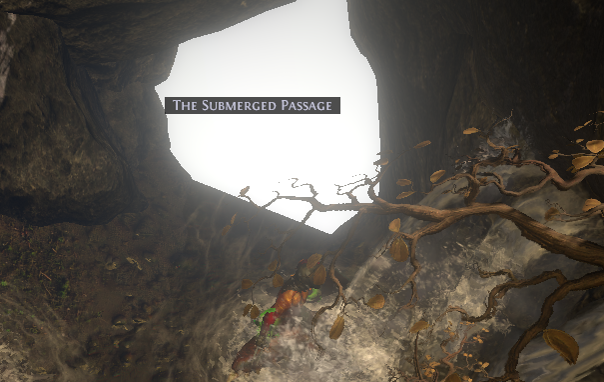
The Submerged Passage is now open. Speak to Tarkleigh for your reward.
Quest Rewards
Quest Complete – You have opened the Submerged Passage and have received a reward from Tarkleigh.
| Class → | Witch | Shadow | Ranger | Duelist | Marauder | Templar | Scion |
|---|---|---|---|---|---|---|---|
| Quest ↓ | |||||||
| Breaking Some Eggs Act 1 |

Path of Exile Guides & Tips
- The Wolf’s Shadow Divination Card PoE – Farming Hyaon’s Fury
- How to Sell PoE Currency Bulk 3.10
- Primal Chimeral Grain PoE 3.11
- PoE Frigid Fossil Mods – More Cold modifiers
- Block Chance Reduction Support PoE
- Timeless Maraketh Emblem & Splinter – PoE Legion
- The Stormwall Prophecy – The Storm Spire PoE
- Primal Blisterfruit PoE 3.11
- Etched in Blood Divination Card PoE – Farming Rigwald’s Quills
- How to Find PoE Session ID
- PoE Tabula Rasa Prophecy – Cleanser of Sins
- Mokou’s Embrace PoE Build & Price – Ruby Ring
- Mirebough Prophecy – Trapped in the Tower PoE
- Skin of the Lords Price, Build & 3D Art – PoE
- Shavronne’s Wrappings Build PoE, Chance, Farming, Recipe