Cartographer’s Incubator PoE – Map Item
![]() Cartographer’s Incubator is an incubator. Incubator is a new item class introduced in the legion league. They are PoE currency items which can be applied to a piece of equipment to guarantee an item drop of a specific type after the specified amount of monsters has been killed. Each equipment can incubate one item at a time.
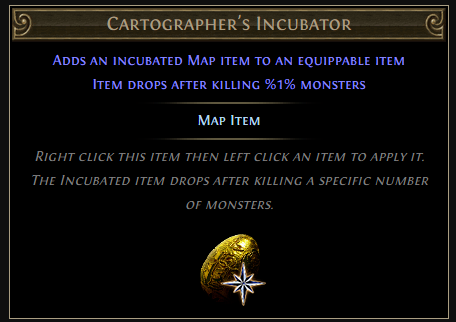
Cartographer’s Incubator is an incubator. Incubator is a new item class introduced in the legion league. They are PoE currency items which can be applied to a piece of equipment to guarantee an item drop of a specific type after the specified amount of monsters has been killed. Each equipment can incubate one item at a time.
How to use Cartographer’s Incubator?
Right click this item then left click an item to apply it. The Incubated item drops after killing a specific number of monsters.
PoE Cartographer’s Incubator Effects
Adds an incubated Map item to an equippable item
Item drops after killing 3133 monsters.
Buy PoE 2 Currency Cheap
- Buy PoE 2 Currency Instant Delivery (6% off coupon: z123). Path of Exile item and currency. Payment: PayPal, Skrill, Cryptocurrencies.
Incubation Effect: Map Item
| Map | Level | Tier | LayoutRating | BossRating | Tileset |
|---|---|---|---|---|---|
| Beach Map | 71 | 4 | A | 2 | The Beacon (1st half) |
| Dungeon Map | 69 | 2 | C | 4 | The Prison |
| Graveyard Map | 72 | 5 | B | 3 | The Fellshrine Ruins |
| Lookout Map | 71 | 4 | A | 3 | The Cathedral Rooftop |
| Alleyways Map | 68 | 1 | A | 3 | Oriath Square |
| Arid Lake Map | 69 | 2 | B | 3 | The Fetid Pool |
| Desert Map | 70 | 3 | C | 3 | The Dried Lake |
| Flooded Mine Map | 71 | 4 | B | 2 | The Submerged Passage |
| Marshes Map | 72 | 5 | B | 3 | The Mud Flats |
| Pen Map | 72 | 5 | A | 2 | The Slave Pens |
| Arcade Map | 71 | 4 | B | 1 | The Marketplace |
| Burial Chambers Map | 73 | 6 | B | 2 | The Crossroads The Vaal Ruins |
| Cage Map | 72 | 5 | A | 2 | The Slave Pens |
| Cells Map | 76 | 9 | C | 4 | The Crematorium |
| Excavation Map | 69 | 2 | C | 1 | The Mines |
| Iceberg Map | 68 | 1 | B | 3 | The Ascent |
| Leyline Map | 70 | 3 | B | 2 | |
| Peninsula Map | 69 | 2 | A | 2 | The Old Fields |
| Port Map | 71 | 4 | A | 4 | The Quay |
| Fungal Hollow Map | 68 | 1 | B | 3 | The Wetlands |
| Esh’s Domain | 70 | N/A | N/A | 5 | The Chamber of Sins |
| Tul’s Domain | 70 | N/A | N/A | 5 | The Fellshrine Ruins |
| Xoph’s Domain | 70 | N/A | N/A | 5 | Kaom’s Dream |
| The Apex of Sacrifice | 70 | N/A | B | 5 | The Ancient Pyramid |
| Canyon Map | 76 | 9 | A | 5 | The Climb |
| Chateau Map | 77 | 10 | C | 4 | Labyrinth Outdoors |
| City Square Map | 71 | 4 | B | 3 | Oriath Square |
| Courthouse Map | 79 | 12 | C | 4 | The Templar Courts |
| Glacier Map | 71 | 4 | A | 3 | The Climb |
| Grotto Map | 72 | 5 | C | 3 | The Den |
| Lighthouse Map | 75 | 8 | B | 3 | The Beacon |
| 77 | 10 | B | The Lord’s Labyrinth | ||
| Relic Chambers Map | 77 | 10 | B | 2 | The Reliquary |
| Strand Map | 69 | 2 | A | 3 | The Twilight Strand |
| 69 | 2 | C | 4 | The Ship Graveyard | |
| Volcano Map | 75 | 8 | A | 4 | Kaom’s Dream |
| Ancient City Map | 72 | 5 | C | 4 | The Vaal City |
| Barrows Map | 70 | 3 | C | 3 | The Wetlands The Vaal Ruins |
| Channel Map | 70 | 3 | C | 4 | The Aqueduct |
| Conservatory Map | 75 | 8 | C | 3 | The Bath House |
| Haunted Mansion Map | 69 | 2 | C | 2 | |
| Ivory Temple Map | 81 | 14 | C | 3 | The Lunaris Temple Level 1 (Act 3) The Imperial Gardens |
| Maze Map | 70 | 3 | C | 4 | The Vaal Ruins |
| Spider Lair Map | 70 | 3 | B | 3 | The Chamber of Sins The Weaver’s Chambers |
| Sulphur Vents Map | 72 | 5 | C | 3 | The Boiling Lake |
| Toxic Sewer Map | 75 | 8 | C | 3 | The Sewers |
| 72 | 5 | ||||
| Academy Map | 74 | 7 | C | 4 | The Archives |
| Atoll Map | 70 | 3 | A | 4 | The Ledge |
| 68 | 1 | A | 3 | The Ledge | |
| Ashen Wood Map | 70 | 3 | B | 2 | The Ashen Fields |
| Cemetery Map | 75 | 8 | B | 5 | The Fellshrine Ruins |
| 75 | 8 | B | 4 | The Crypt | |
| Fields Map | 74 | 7 | C | 2 | The Imperial Fields |
| Jungle Valley Map | 70 | 3 | A | 2 | The Riverways |
| Mausoleum Map | 71 | 4 | B | 2 | The Ossuary (Act 10) |
| Phantasmagoria Map | 75 | 8 | A | 2 | The |
| Thicket Map | 72 | 5 | B | 3 | The Dread Thicket |
| Underground Sea Map | 71 | 4 | C | 2 | Merveil’s Caverns |
| 71 | 4 | B | 1 | The Submerged Passage The Crypt The Chamber of Sins |
|
| Wharf Map | 77 | 10 | A | 2 | The Docks |
| Arachnid Nest Map | 77 | 10 | B | 5 | The Weaver’s Chambers |
| Bazaar Map | 74 | 7 | B | 3 | The Marketplace |
| Bone Crypt Map | 74 | 7 | C | 2 | The Catacombs |
| 74 | 7 | A | 4 | The Catacombs | |
| Coral Ruins Map | 76 | 9 | C | 4 | |
| Dunes Map | 75 | 8 | B | 3 | The Vastiri Desert |
| 75 | 8 | C | 3 | The Vastiri Desert | |
| Gardens Map | 80 | 13 | C | 2 | The Imperial Gardens |
| Lava Chamber Map | 75 | 8 | B | 3 | The Crematorium |
| Ramparts Map | 69 | 2 | A | 3 | The Sarn Ramparts |
| Residence Map | 73 | 6 | B | 5 | The Sceptre of God |
| Underground River Map | 76 | 9 | A | 3 | The Caverns |
| 76 | 9 | B | 4 | The Caverns | |
| Armoury Map | 71 | 4 | B | 2 | Labyrinth Indoors |
| Courtyard Map | 72 | 5 | B | 4 | The Imperial Gardens |
| 72 | 5 | C | 3 | The Battlefront | |
| Geode Map | 73 | 6 | C | 3 | The Quarry |
| Infested Valley Map | 75 | 8 | B | 4 | The Wetlands (Act 6) |
| Laboratory Map | 76 | 9 | B | 3 | The Reliquary |
| Mineral Pools Map | 74 | 7 | A | 3 | Merveil’s Caverns |
| Mud Geyser Map | 74 | 7 | B | 5 | The Fetid Pool |
| Overgrown Ruin Map | 77 | 10 | C | The Chamber of Sins | |
| Shore Map | 74 | 7 | B | 3 | The Coast |
| 74 | 7 | C | 4 | The Tidal Island | |
| The Pale Court | 75 | N/A | A | 5 | The Ancient Pyramid |
| Tropical Island Map | 76 | 9 | A | 2 | The Southern Forest |
| Uul-Netol’s Domain | 75 | N/A | N/A | 5 | The Library |
| 75 | 8 | B | 2 | The Southern Forest | |
| Vaal Pyramid Map | 76 | 9 | C | 5 | The Ancient Pyramid |
| 76 | 9 | A | 0 | The Vaal Ruins | |
| Arena Map | 78 | 11 | B | 4 | The Grand Arena |
| Estuary Map | 74 | 7 | B | 1 | |
| Moon Temple Map | 77 | 10 | C | 4 | The Lunaris Temple (Act 8) |
| 77 | 10 | The Lunaris Temple (Act 8) The Solaris Temple |
|||
| Museum Map | 76 | 9 | C | 5 | The Library |
| 76 | 9 | C | 4 | The Library | |
| Plateau Map | 77 | 10 | A | 3 | The Ridge |
| Scriptorium Map | 77 | 10 | A | 4 | The Library The Crypt |
| Sepulchre Map | 73 | 6 | The Ossuary (Act 5) The Rotting Core (Doedre’s |
||
| Temple Map | 76 | 9 | C | 3 | The Solaris Temple |
| 76 | 9 | B | 5 | The Lunaris Temple Level 2 (Act 3) | |
| Tower Map | 80 | 13 | B | 4 | Shavronne’s Tower |
| Vault Map | 73 | 6 | B | 4 | Labyrinth Indoors |
| Waste Pool Map | 82 | 15 | C | 3 | The Sewers |
| Arachnid Tomb Map | 75 | 8 | A | 2 | The Temple of |
| Belfry Map | 81 | 14 | A | 5 | The Cathedral Rooftop |
| Bog Map | 78 | 11 | B | 3 | The Fetid Pool |
| Cursed Crypt Map | 68 | 1 | C | 3 | The Crypt |
| 68 | 1 | A | 2 | The Crypt | |
| Orchard Map | 75 | 8 | C | 4 | The Imperial Gardens |
| Pier Map | 74 | 7 | C | 2 | The Docks |
| Precinct Map | 79 | 12 | B | 4 | The Slums |
| Shipyard Map | 80 | 13 | B | The Docks | |
| Siege Map | 80 | 13 | A | 4 | The Ruined Square |
| 77 | 10 | ||||
| Wasteland Map | 78 | 11 | C | 4 | The Dried Lake |
| Colonnade Map | 80 | 13 | A | 3 | The Battlefront |
| Coves Map | 78 | 11 | B | 4 | The Ship Graveyard |
| Factory Map | 77 | 10 | C | 1 | The Refinery |
| Mesa Map | 77 | 10 | A | 2 | The Ledge |
| Lair Map | 73 | 6 | B | 5 | The Caverns |
| Pit Map | 73 | 6 | C | 3 | Daresso’s Dream |
| Primordial Pool Map | 73 | 6 | A | 3 | Maligaro’s Sanctum |
| Promenade Map | 73 | 6 | A | 3 | The Grand Promenade |
| 73 | 6 | A | 5 | The Grand Promenade | |
| Spider Forest Map | 74 | 7 | C | 2 | The Northern Forest |
| Waterways Map | 75 | 8 | C | 3 | The Aqueduct |
| Castle Ruins Map | 76 | 9 | B | 2 | The Broken Bridge |
| Crystal Ore Map | 79 | 12 | B | 5 | The Crystal Veins |
| Defiled Cathedral Map | 82 | 15 | The Desecrated Chambers | ||
| Necropolis Map | 73 | 6 | C | 3 | The Crypt |
| 73 | 6 | A | 5 | The Crypt | |
| Overgrown Shrine Map | 73 | 6 | C | 4 | The Chamber of Sins The Rotting Core (Maligaro’s Misery) |
| 73 | 6 | C | 2 | The Chamber of Sins | |
| Racecourse Map | 81 | 14 | A | 3 | The Grand Arena |
| Summit Map | 80 | 13 | The Ascent | ||
| Primordial Blocks Map | 81 | 14 | C | 4 | The Prison |
| Villa Map | 76 | 9 | C | 3 | The Sceptre of God |
| Arsenal Map | 78 | 11 | C | 2 | The Grain Gate |
| Caldera Map | 81 | 14 | C | 4 | Kaom’s Stronghold |
| Core Map | 82 | 15 | C | 5 | |
| Chayula’s Domain | 80 | N/A | N/A | 5 | The Mines |
| Desert Spring Map | 78 | 11 | The Oasis | ||
| Ghetto Map | 74 | 7 | C | 3 | The Slums |
| Malformation Map | 79 | 12 | C | 4 | The |
| Park Map | 80 | 13 | Oriath Square | ||
| Shrine Map | 81 | 14 | B | 4 | The Lunaris Temple Level 2 (Act 3) |
| Terrace Map | 79 | 12 | C | 4 | The High Gardens |
| The Alluring Abyss | 80 | N/A | B | 5 | The Ancient Pyramid |
| Acid Caverns Map | 79 | 12 | A | 4 | The Fetid Pool |
| Colosseum Map | 80 | 13 | A | 5 | Daresso’s Dream The Grand Arena |
| Crimson Temple Map | 80 | 13 | The Ossuary The Desecrated Chambers |
||
| Dark Forest Map | 82 | 15 | B | 5 | The Western Forest |
| Dig Map | 78 | 11 | The Quarry | ||
| Palace Map | 78 | 11 | C | 5 | The Upper Sceptre of God |
| Plaza Map | 81 | 14 | B | 5 | Labyrinth Outdoors |
| Basilica Map | 78 | 11 | The Chamber of Innocence | ||
| Carcass Map | 79 | 12 | The |
||
| Lava Lake Map | 82 | 15 | A | 5 | The Karui Fortress Kaom’s Stronghold |
| Reef Map | 79 | 12 | B | 4 | The Brine King’s Reef |
| Sunken City Map | 79 | 12 | The Causeway | ||
| 82 | 15 | ||||
| Forge of the Phoenix Map | 83 | 16 | B | 5 | The Crematorium |
| Lair of the Hydra Map | 83 | 16 | A | 5 | The Sewers |
| Maze of the Minotaur Map | 83 | 16 | A | 5 | The Caverns |
| Pit of the Chimera Map | 83 | 16 | B | 5 | Daresso’s Dream |
| Vaal Temple Map | 83 | 16 | C | 5 | The Ancient Pyramid |
| The Shaper’s Realm | 84 | N/A | B | 5 | Several |
| Crater Map | 72 | 5 | Azurite Mine |
Path of Exile Guides & Tips
- Stalwart Defenders PoE – Ivory Watchstone
- Cobalt Watchstone PoE Guide
- Uzaza’s Meadow PoE Price & Build – Sapphire Ring
- Conquerors of the Atlas – PoE 3.9
- Skin of the Loyal Build Guide & Price – PoE Simple Robe
- PoE Primitive Alchemical Resonator Guide
- Otherworldly Incubator PoE – Unique Map Item
- Gilded Fossil Guide – Best Use, Crafting, Mirror Shard
- PoE Headhunter: Headhunter Item Level, Build, PoE Headhunter Farming
- Corroded Fossil Mods, Drop Location – PoE
- Xoph’s Blood PoE Build, Price, Farming Drop Rate – Amber Amulet
- Snakepit PoE Build & Price – Sapphire Ring
- Call of the Brotherhood PoE Build & Price – Two-Stone Ring
- War Among the Stars PoE – Ivory Watchstone
- Solaris Lorica Build Guide & Price – PoE Copper Plate